Clik here to view.
There are many ways to import data into Snowflake, with the simplest being via the standard user interface. To import data, we must meet the following requirements:
- The data must be in a suitable file format
- A warehouse in Snowflake must exist to perform the import
- A destination database must exist in Snowflake
- A destination table must exist within the Snowflake database
Preparing Data for Import
For this example, we will be loading the following data, which is currently stored in an Excel .xlsx file:
Image may be NSFW.
Clik here to view.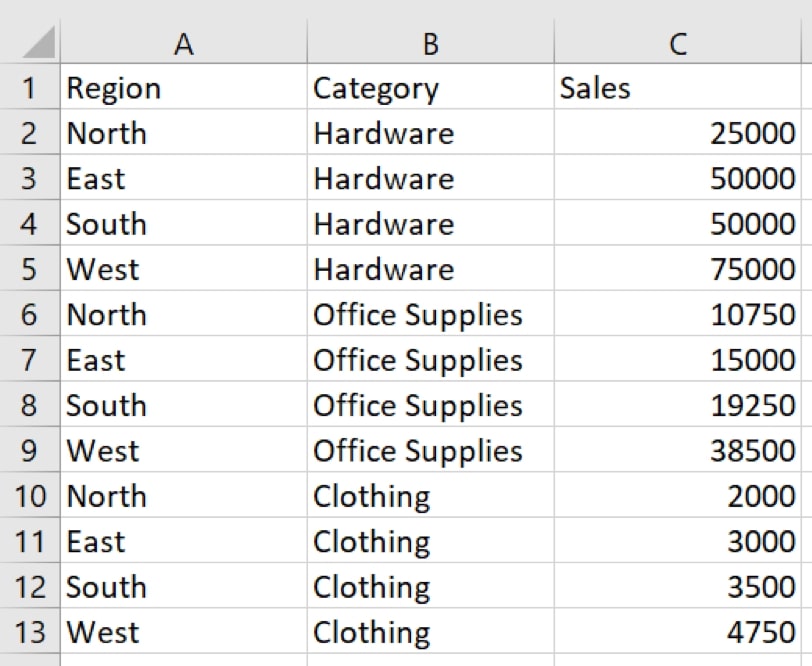
Before we can import any data into Snowflake, it must first be stored in a supported format. At the time of writing, the full list of supported is contained in the table below. An up-to-date list of supported file formats can be found in Snowflake’s documentation:
Image may be NSFW.
Clik here to view.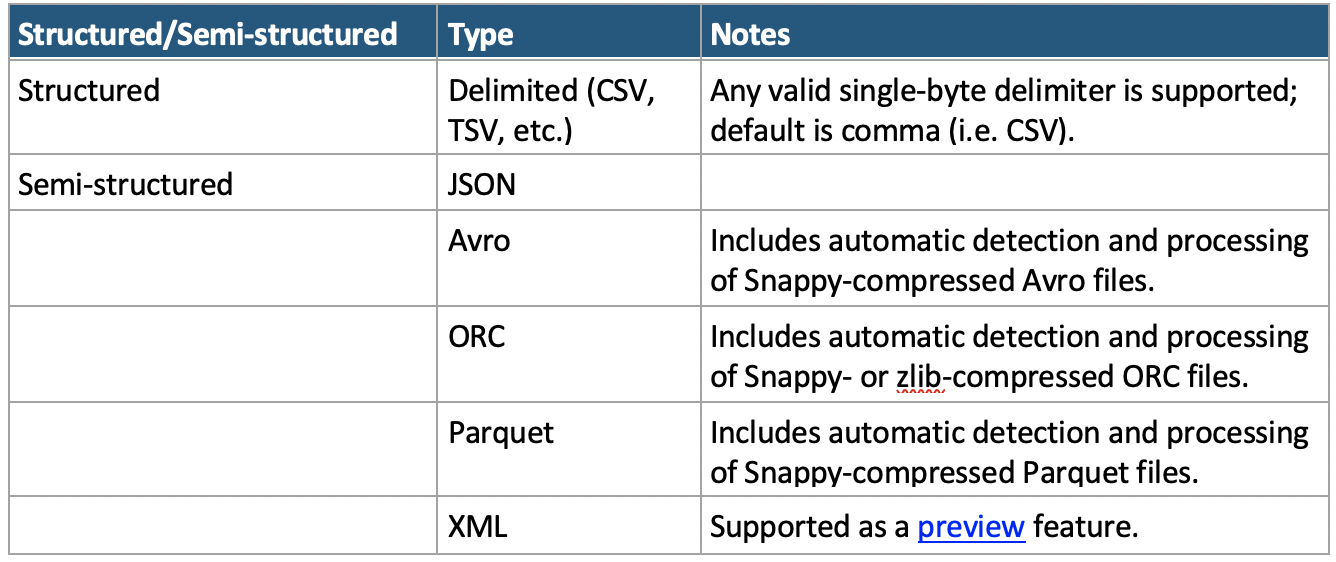
*Note: The XML preview feature link can be accessed here
As our data is currently stored in an Excel .xlsx format that is not supported, we must transform it into a suitable data transfer format. Since our data is structured, we will use a standard CSV format. The data is transformed by opening it in Excel and using File > Save As… to save as a CSV file. Different software platforms may vary in how they output data to CSV.
We can verify the format by opening the new file with a text editor such as Notepad. Here, we can see that the data is now in a structured format, with a comma delimiting each field of data:
Image may be NSFW.
Clik here to view.
Preparing a Warehouse
We encourage Snowflake users to test their data loads with various warehouse sizes to find their optimal balance between credit cost to performance. As we are loading a very small file in a bespoke instance, we will use an extra-small warehouse. This warehouse has been called LOAD_WH:
Image may be NSFW.
Clik here to view.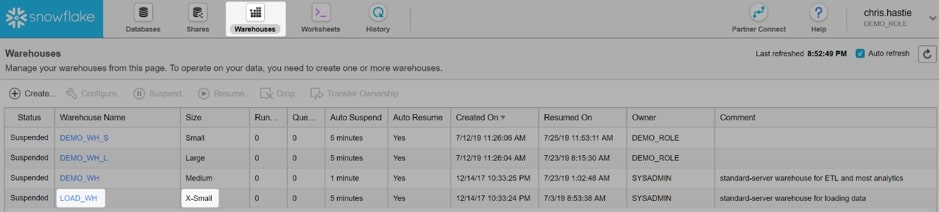
Preparing the Destination Database and Table
Before we can import our data into Snowflake, we must provide a destination. As we are going to import the data using the user interface, our destination must be a table within a database in Snowflake. For this example, we will create a table inside the DEMO_DB database. We begin by opening this database within Snowflake:
Image may be NSFW.
Clik here to view.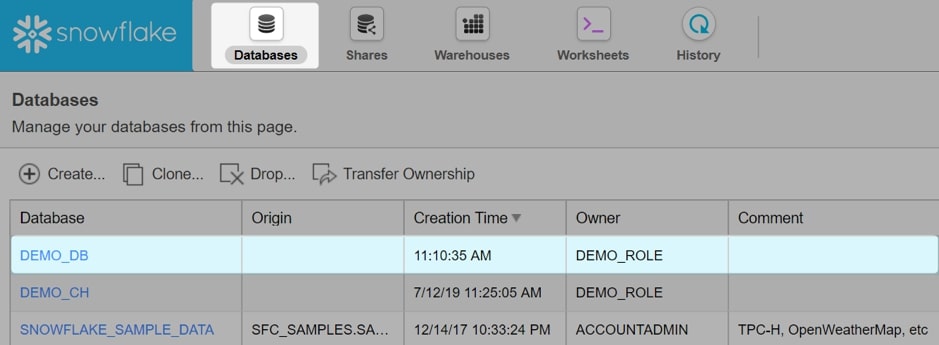
The database opens to show a list of tables. Currently, our database is empty and does not have any tables, which is why the list is blank. Select Create… to create a new table:
Image may be NSFW.
Clik here to view.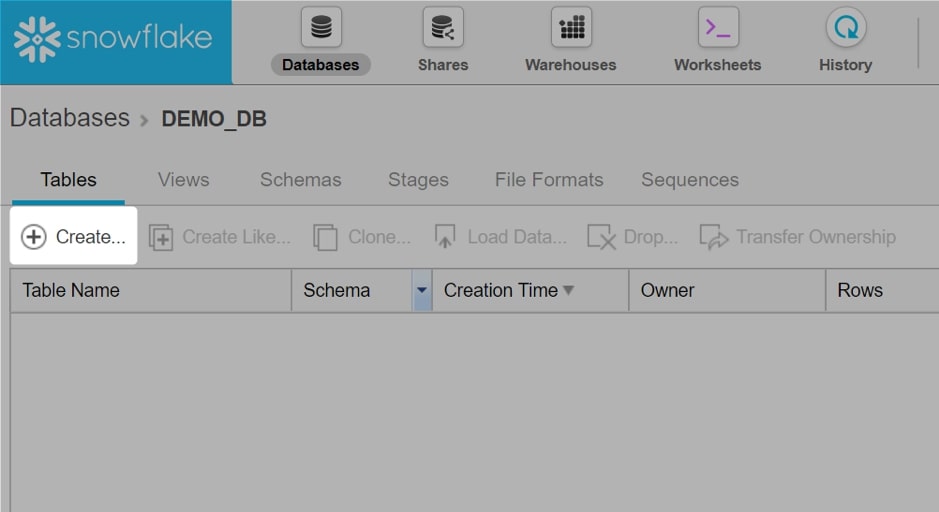
This opens the window for creating a table. We give the table a name and a schema before adding the required columns. Notice that each column is given a type; our Region and Category fields are strings, and our Sales field is an integer. An up-to-date list of field types and their properties is contained in Snowflake’s documentation:
Image may be NSFW.
Clik here to view.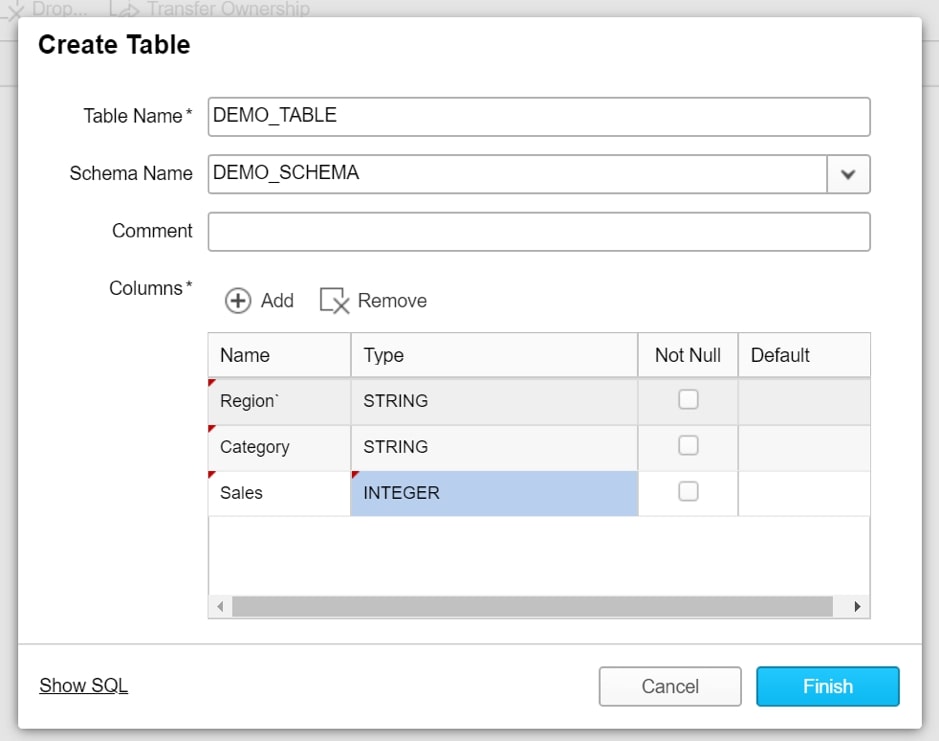
After creating the table, it will appear on the list within the database:
Image may be NSFW.
Clik here to view.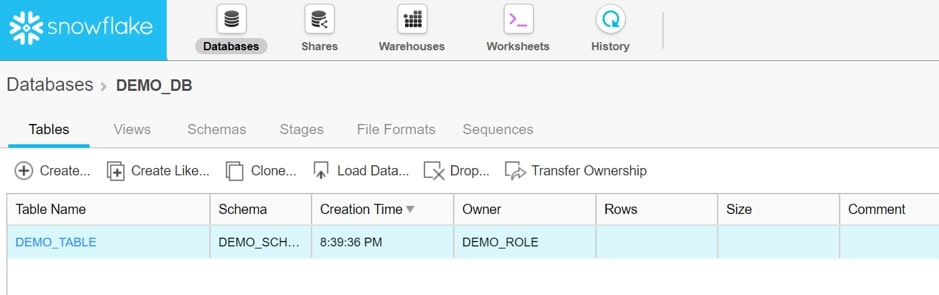
Importing Data via the “Load Table” Interface
Select the table to open it. This window describes the table by listing the columns and their properties. Notice the option to load a table, which we will now use to import our data:
Image may be NSFW.
Clik here to view.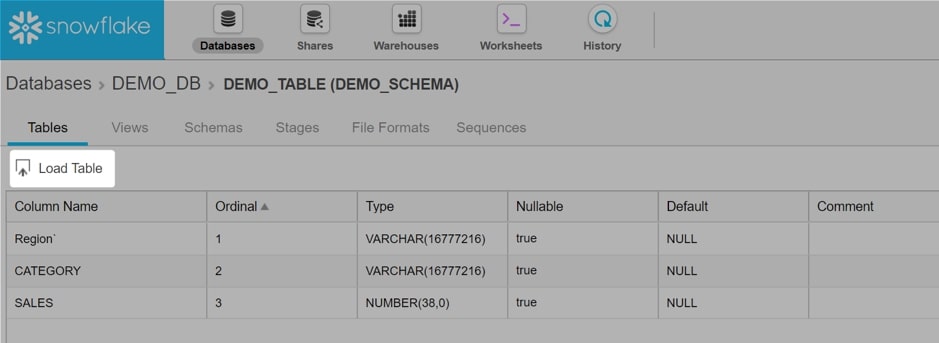
The first menu allows the user to select a warehouse. As mentioned previously, we will be importing our data using our LOAD_WH warehouse. Select this in the dropdown and choose Next:
Image may be NSFW.
Clik here to view.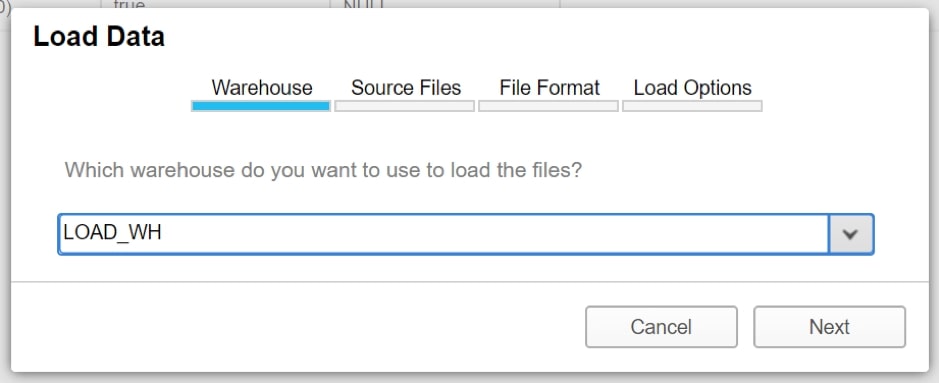
Next, we select the files to load from our computer. The Select Files button opens a standard explorer interface where you can choose your file(s). Once this is completed, select Next:
Image may be NSFW.
Clik here to view.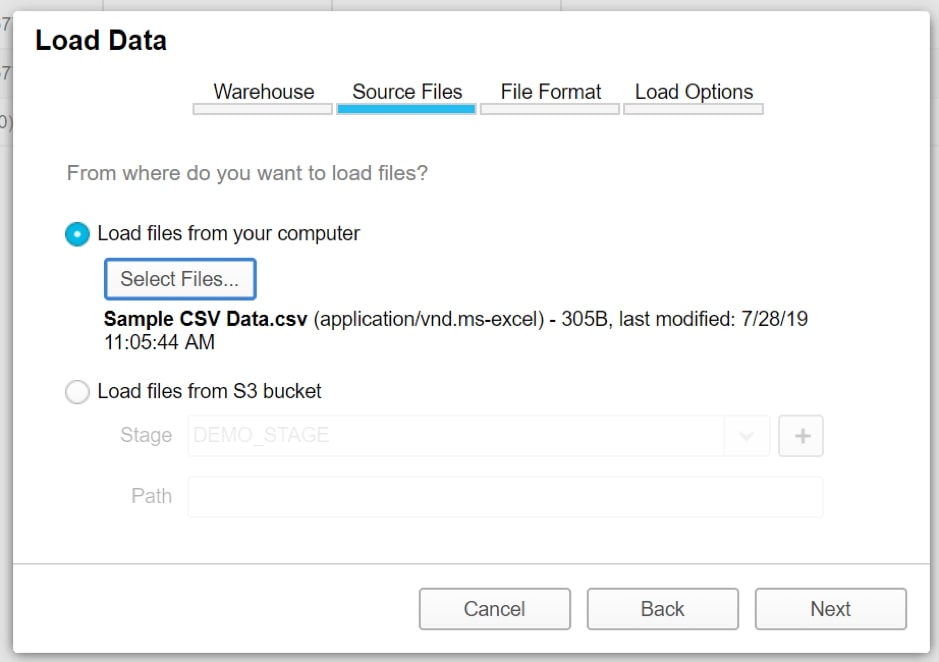
Snowflake will then request a file format to load the data. This informs Snowflake on how your data is structured so that it can be parsed correctly. Existing file formats will be listed in the drop-down menu. The + icon is used to add a new file format to this list:
Image may be NSFW.
Clik here to view.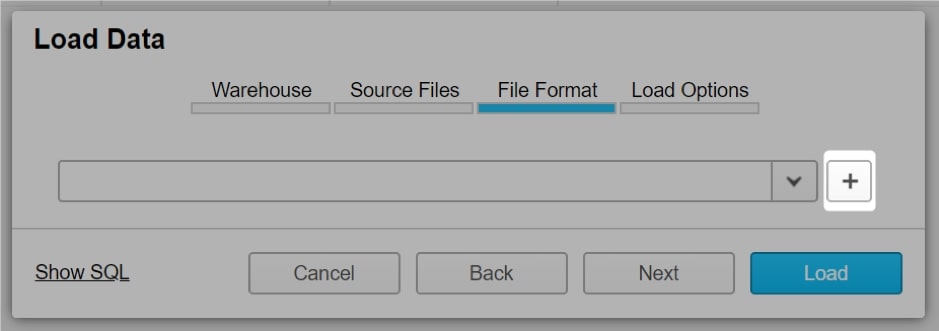
By viewing our file in Notepad again, we can remind ourselves of this format:
Image may be NSFW.
Clik here to view.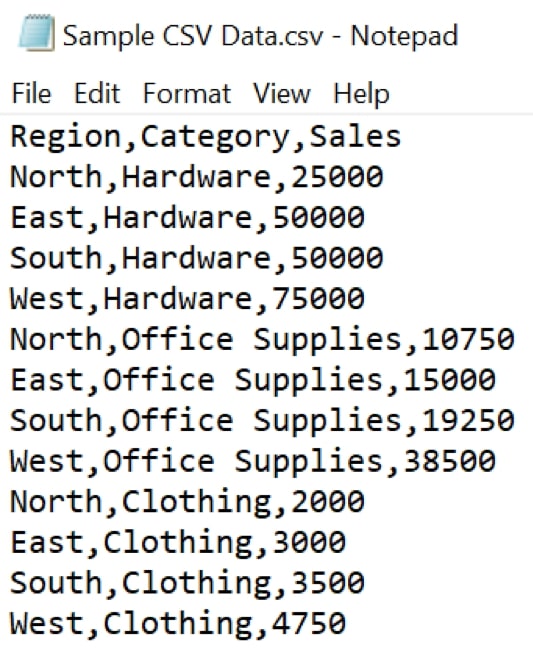
Snowflake’s default options match a standard CSV well; however, we may need to change a few options. We name our file format, verify that our column separator is indeed a comma and set Header lines to skip to the value of 1. We do this as the first line of data in our file contains the column names, which we do not want to import into our table in Snowflake:
Image may be NSFW.
Clik here to view.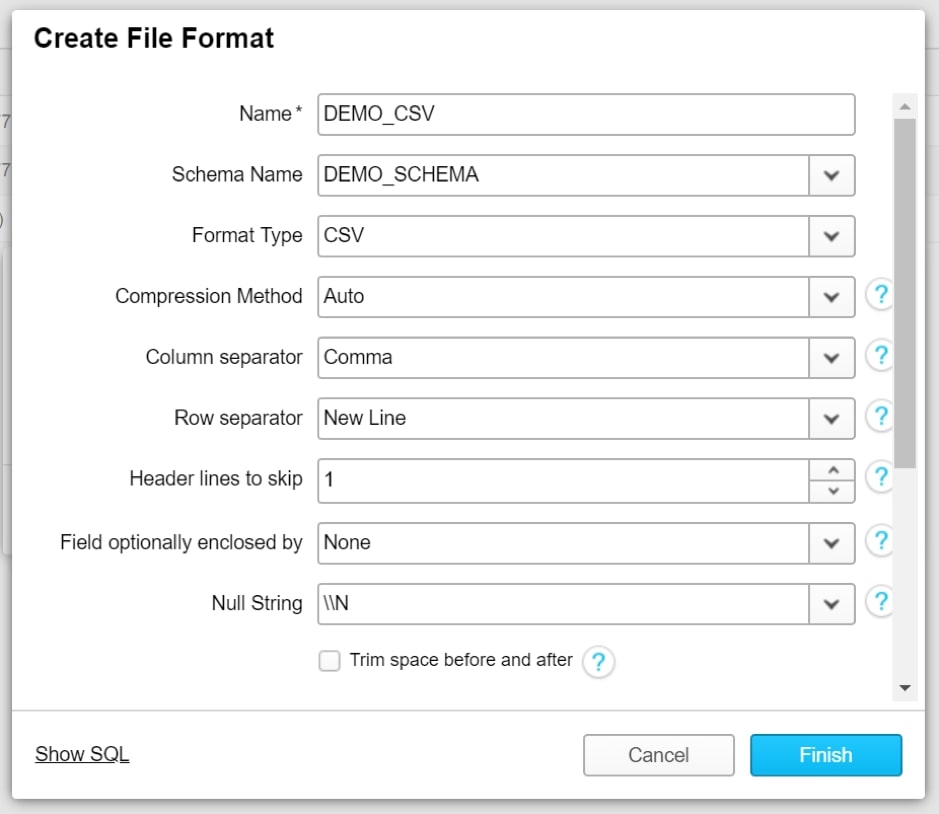
Once the file format is created, it appears on the drop-down list. Select the file format and choose Load:
Image may be NSFW.
Clik here to view.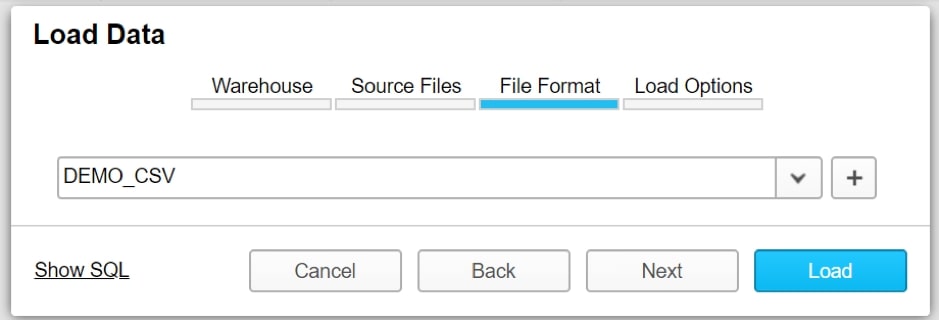
After loading the data, Snowflake will output the results for the load. This covers each file that was imported, along with the number of rows parsed and loaded:
Image may be NSFW.
Clik here to view.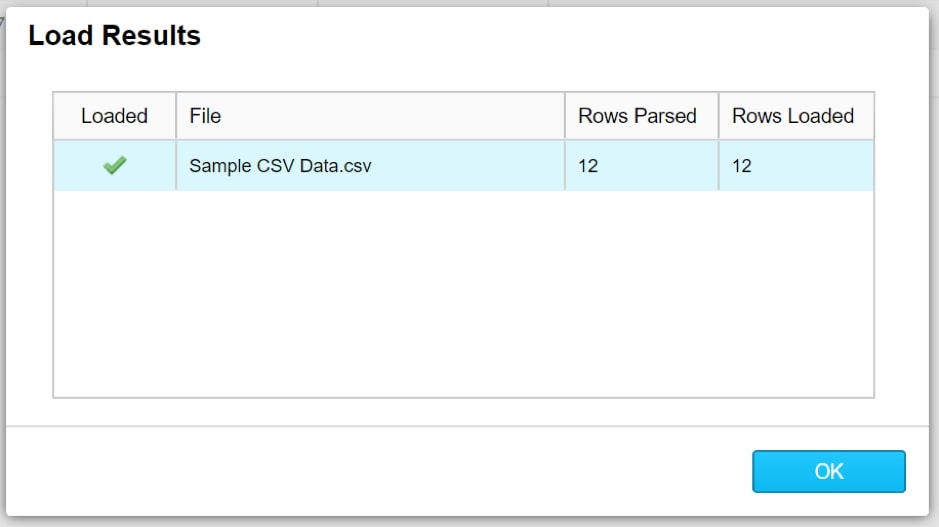
The file has now been loaded. This can be verified by opening the Worksheets tab, locating the database, schema and table in which the data was loaded and selecting Previous Data:
Image may be NSFW.
Clik here to view.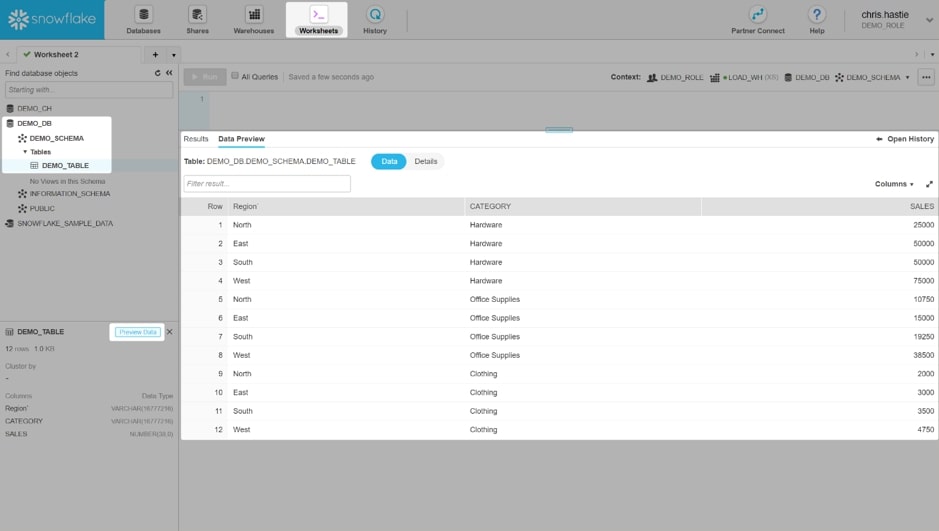
The post Zero to Snowflake: Importing Data Without Code via the User Interface appeared first on InterWorks.