You have a shapefile. You have a custom background. They belong together. Now it’s just a matter of figuring out how to make it work in Tableau …
This is a common challenge we get in both Tableau training and through InterWorks Assist. The best way to illustrate how this holy union is to naturally show an example with famous monuments across the world.
My Example: All Roads Lead to Indy
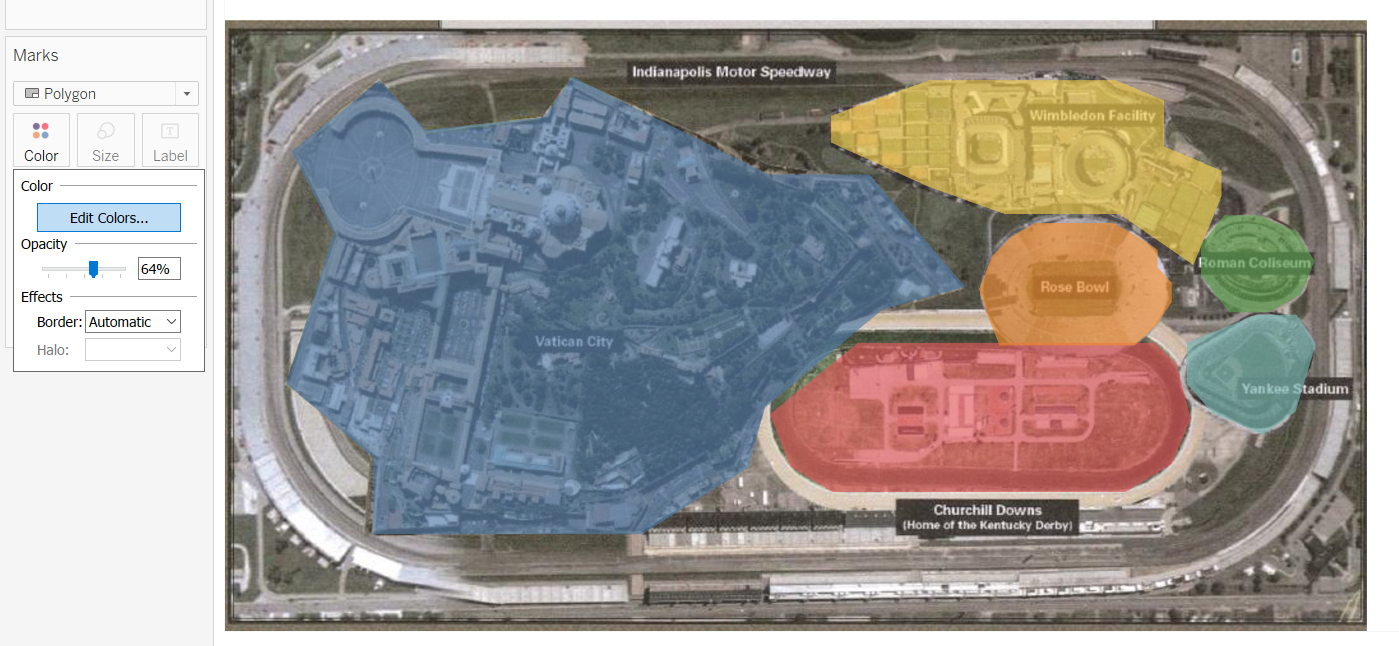
Below is a picture of the Indianapolis Motor Speedway, showing the different monuments that can fit inside the massive race track. I have the image. I have a shapefile (with help from Drawing Tool for Tableau). I want to be able to use the polygons on the custom image:

First, add the GEOMETRY field to your view:

You can see the different dots that seem to outline the monuments above. We just need to tell Tableau a few things:
- Which dots belong to which shapes
- Which mark type we want (polygon)
- The order in which to draw the polygon
First, I’ll add my Shape ID, or my structure name, to Color so we can see the difference. We get something like we see below:

Next, I’ll change our mark type to Polygon. Be warned! Since we haven’t told Tableau the order of the points, this might look pretty scary:

Finally, I’ll add Point ID (which contains the order to connect the points), to the Path box in the Marks card:

Much better! But now I want to add the image to the background. In the toolbar, I hover over Maps, select Background Images from the drop-down menu and select the datasource I’m using:

I’ll then select to add the image and input the appropriate information:

Notice how the X and Y fields are mapped to the X and Y columns from my data. Tableau will likely default to Longitude and Latitude because we started with the Geometry field.
Next, I click OK, and nothing has happened yet. The reason for this is that Tableau is still using the longitude and latitude coordinates it generated from the shapefile. I need to remove both Latitude and Longitude, then replace them with my original X and Y coordinates:

Now for some final formatting steps. I’ll remove the X and Y axis by right-clicking each axis in deselecting Show Header. Next, I’ll go into my Marks card and click on Color. Near the bottom of the drop-down, there is an axis showing “opacity.” I’ll adjust it down from 100 so we can start to see the background image better:

For this map, I decided to turn my opacity all the way down to zero. Now, the image appears exactly like my original, but it has the added interactivity we all know and love in Tableau. I can add a tooltip, use it as a filter or highlighter and even adjust the color using the Colors card.
The post Advance with Assist: Using Custom Backgrounds with Polygon Shapefiles appeared first on InterWorks.