Clik here to view.
URL actions are powerful and useful things to have in your Tableau dashboards. Many use these actions to navigate from one dashboard to another. Portals for Tableau supports URL actions, but we suggest a few adjustments for the best results. This guide will help you to make these changes and optimize your URL actions for use in Portals for Tableau.
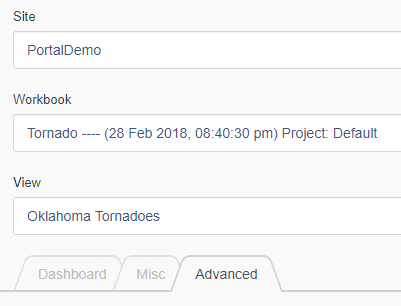
Step 1: Origin Dashboard
To start, add your origin dashboard to the portal. For a deeper dive on this subject, please check out my earlier blog post: Portals for Tableau 101: Dashboard Creation. After you have added your dashboard, click on the Advanced tab.
Image may be NSFW.
Clik here to view.
Now, scroll down to the Embedded Options section so that we can set a new Link Target. The Link Target drop-down controls the Tableau dashboard’s link behavior. For your origin dashboard, set this to Parent. This will allow your users to navigate in the current tab to the new destination dashboard.
Image may be NSFW.
Clik here to view.
Step 2: Destination Dashboard
This is where we will create the destination dashboard. This will be set up similar to the origin dashboard in the previous step. You will want to change the new destination dashboard’s Link Target to be Parent as well. This will allow the destination dashboard to navigate if we have more URL actions.
If you want this destination dashboard to be only accessible through a direct link, like a URL action, then we will need to set the dashboard to be Hidden. To toggle this on you will need to click on the Misc tab.
Image may be NSFW.
Clik here to view.
Scroll down to the Look/Feel section for the Hidden switch and toggle that to ON.
Image may be NSFW.
Clik here to view.
Repeat Step 2 for each different destination dashboard.
Step 3: Tableau Workbook Updates
Now, open your workbooks in Tableau Desktop. In Tableau Desktop you will want to edit the URL actions to link to the dashboards you created in the portal in Step 2. This is to replace the reference to the Tableau Server so the user always stays in the portal.
Image may be NSFW.
Clik here to view.
Since we are passing data values over the URL, check the box to URL encode data:
You can pass filters and parameters through the URL, just as you would on Tableau Server. For more on doing this, view Tableau’s post on the subject.
Once you have completed these steps, you will have optimized dashboard URL actions with Portals for Tableau. These steps will keep the user experience within your portal while still providing them the power of URL actions.
The post Portals for Tableau 101: URL Actions appeared first on InterWorks.
